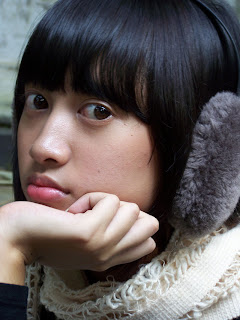
I am using this picture:
So here is the step. First, just do the first basic that I already told you before (previous post). And you will produce a picture like this:

Second, duplicate your image using ctrl+J and then go to Image>Adjustment>Gradient Map. And then you will see a new window, and just set the gradient like this:
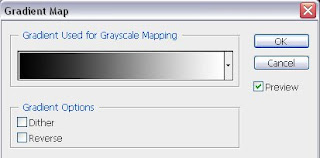
I only use black and white. And then click OK.
Third, change the blending setting to Soft Light and the opacity to 75% just like this:
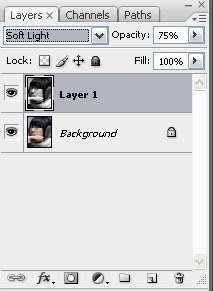
And you will produce a picture like this:

After that, please merge down image using ctrl+E.
If you already satisfied with this picture you can stop here, but to make it more dramatic do this next step:
Duplicate the layer using ctrl+J, and then go to Channels button and choose the Green layer like this:
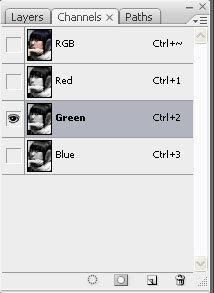
After that, select all the canvas using ctrl+A, and then ctrl+C to copy. Then, click the layers button and press ctrl+shift+N to make a new layer and then press ctrl+v to paste it. And you will produce a picture like this:

After that, change the blending setting to Screen and change the opacity to 65%. And you will produce a picture like this:

And, you’re done!
Thank you and sorry (again) for my bad English… Just correct me if I’m wrong.. :)
No comments:
Post a Comment
Thank you :)